
As a long-time Corvette enthusiast and DIY mechanic, I’ve tackled my fair share of repairs on these classic American sports cars. One of the most rewarding (and occasionally frustrating) projects I’ve undertaken was replacing the transmission gasket on my 1078 Corvette.
In this comprehensive guide, I’ll walk you through the entire process, sharing my personal experience, tips, and tricks I’ve learned along the way. Whether you’re a seasoned gearhead or a newcomer to the world of Corvette maintenance, this article will provide you with all the information you need to successfully replace your transmission gasket.
Understanding the 1078 Corvette Transmission
Before we dive into the nitty-gritty of gasket replacement, let’s take a moment to understand the transmission in the 1978 Corvette. This year model typically came with either a 3-speed automatic transmission (TH350) or a 4-speed manual transmission (M21 or M20). The process I’ll describe focuses on the automatic transmission, but many steps are similar for the manual version.
Why Replace the Transmission Gasket?
In my case, I noticed a persistent oil leak underneath my Corvette. After some investigation, I traced it back to the transmission pan gasket. Common signs of a failing transmission gasket include:
- Oil spots on your garage floor
- Low transmission fluid levels
- Burning smell while driving
- Transmission slipping or shifting issues
If you’re experiencing any of these symptoms, it might be time to replace your transmission gasket.
Tools and Materials Needed
Before you start, make sure you have the following tools and materials on hand:
- Jack and jack stands
- Wheel chocks
- Socket set and ratchet
- Torque wrench
- Flathead screwdriver
- Gasket scraper
- Clean rags
- Degreaser
- New transmission pan gasket (make sure it’s specific to the 1978 Corvette)
- Transmission fluid (Dexron II or equivalent)
- Drain pan
- Funnel
- Flashlight
- Safety glasses and gloves
- Having all these items ready before you start will make the process much smoother.
How To Replace Transmission Gasket on a 1078 corvette
1. Preparation
Safety first! Start by parking your Corvette on a level surface. Engage the parking brake and place wheel chocks behind the rear wheels. This is crucial for your safety when working underneath the car.
2. Raising the Vehicle
Using your jack, carefully lift the front of the Corvette and secure it with jack stands. Make sure the car is stable before crawling underneath. I always give the car a firm shake to ensure it’s not going anywhere.
3. Locating the Transmission Pan
Once under the car, locate the transmission pan. It’s a large, rectangular pan attached to the bottom of the transmission. In the 1978 Corvette, it’s typically held in place by numerous bolts around its perimeter.
4. Draining the Transmission Fluid
Place your drain pan underneath the transmission pan. Loosen the bolts around the pan, but don’t remove them completely yet. As you loosen the bolts, the fluid will start to drain. I usually start with the rear bolts and work my way forward, allowing the fluid to drain towards the back.
Pro tip: The fluid can be hot if you’ve recently driven the car, so be careful!
5. Removing the Transmission Pan
Once the fluid has drained, remove all the bolts and carefully lower the pan. Be prepared for some residual fluid to spill out. The pan might be stuck due to old gasket material, so you may need to gently pry it loose with a flathead screwdriver. Be careful not to damage the pan or the mating surface on the transmission.
6. Cleaning the Surfaces
This is where the real work begins. Using your gasket scraper and degreaser, thoroughly clean both the transmission pan and the mating surface on the transmission. Be meticulous here – any leftover gasket material or debris can cause leaks in your new gasket.
I spent a good hour on this step, ensuring every last bit of old gasket was removed. It’s tedious work, but trust me, it pays off in the end.
7. Inspecting the Pan and Components
While you have the pan off, take some time to inspect it for any damage or warping. Also, check the transmission filter (if applicable) and consider replacing it if it looks dirty or clogged. This is a great opportunity to address any other issues you might find.
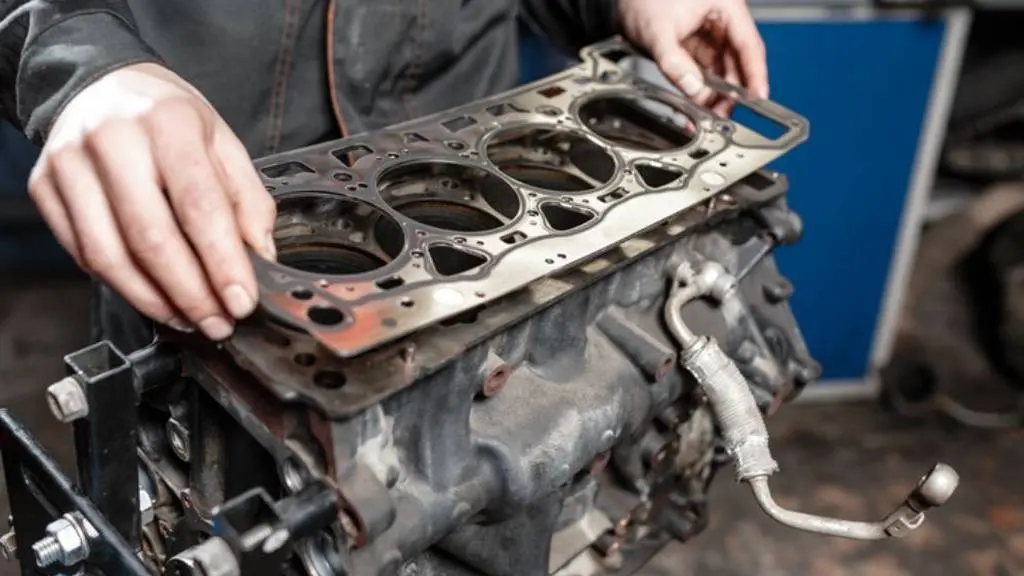
8. Installing the New Gasket
Now for the moment of truth – installing the new gasket. Carefully place the new gasket onto the clean transmission pan. Make sure it’s seated correctly and not twisted or pinched anywhere. Some gaskets come with adhesive, but if yours doesn’t, you can use a small amount of gasket sealer to hold it in place.
9. Reattaching the Transmission Pan
Carefully lift the pan with the new gasket into place. Start by hand-threading a few bolts to hold it in position. Then, working in a cross-pattern, begin tightening all the bolts. Don’t fully tighten them yet – just get them snug.
10. Torquing the Bolts
Using your torque wrench, tighten the bolts to the manufacturer’s specifications. For my 1978 Corvette, this was around 12-13 ft-lbs. Always refer to your service manual for the exact torque specifications. Tighten in a star pattern to ensure even pressure on the gasket.
11. Refilling the Transmission Fluid
Now it’s time to refill the transmission with fresh fluid. Using your funnel, carefully add the new fluid through the dipstick tube. The 1978 Corvette transmission typically holds around 11 quarts, but always check your owner’s manual for the exact capacity.
Pro tip: Add the fluid in increments, checking the level frequently to avoid overfilling.
12. Checking for Leaks
Start the engine and let it run for a few minutes. Shift through all the gears while parked to circulate the new fluid. Then, get back under the car and check for any leaks around the pan. If you see any drips, you may need to tighten the bolts a bit more.
13. Final Checks
Lower the car back to the ground and take it for a short test drive. Pay attention to how the transmission shifts and listen for any unusual noises. After the drive, park on a clean, level surface and check again for any leaks.
Common Challenges and How to Overcome Them
Throughout this process, I encountered a few challenges that you might face as well:
1. Stuck bolts: Some of the pan bolts can be stubborn due to age and corrosion. I found that using a penetrating oil and letting it sit for a while helped loosen them up.
2. Warped pan: If your transmission pan is warped, it might not seal properly with the new gasket. In this case, you might need to replace the pan or carefully try to flatten it out.
3. Debris in the transmission: While the pan is off, be careful not to let any dirt or debris fall into the open transmission. I covered the opening with a clean rag when I wasn’t actively working on it.
4. Overfilling the transmission: It’s easy to add too much fluid. Take your time and check the level frequently as you fill.
Maintenance Tips to Extend Gasket Life
Now that you’ve gone through the effort of replacing your transmission gasket, here are some tips to help it last:
- Regular fluid changes: Keep your transmission fluid clean and at the proper level.
- Address leaks promptly: If you notice any new leaks, don’t ignore them.
- Avoid extreme temperature changes: Try not to put excessive stress on your transmission by shifting from drive to reverse before coming to a complete stop.
When to Seek Professional Help
While replacing the transmission gasket on a 1978 Corvette is a manageable DIY project, there are times when it’s best to seek professional help:
- If you notice metal shavings in the old transmission fluid
- If the transmission is slipping or shifting roughly even after the gasket replacement
- If you’re not confident in your ability to properly seal the system
Remember, there’s no shame in asking for help when it comes to maintaining your classic Corvette.
Conclusion:
Replacing the transmission gasket on my 1978 Corvette was a challenging but incredibly rewarding experience. Not only did it save me money on mechanic fees, but it also gave me a deeper understanding and appreciation for my car’s inner workings.
If you decide to tackle this project yourself, take your time, follow these steps carefully, and don’t hesitate to consult your Corvette’s service manual or seek advice from other enthusiasts. The feeling of accomplishment when you take that first leak-free drive is truly unbeatable.
Remember, working on classic cars like the 1978 Corvette is as much about the journey as it is about the destination. Enjoy the process, learn from any mistakes, and take pride in keeping your piece of automotive history running smoothly.